Best label printers for shipping labels: a complete guide for e-commerce businesses
Last updated:
TL;DR: Choosing the right shipping label printer isn’t just about hardware. Manual A4 printing, scaling issues, and multi-carrier complexity quickly slow down e-commerce operations. This guide shows when to switch to a thermal label printer (A6 / 4x6) and how to set up a faster, standardized label printing workflow with bulk and one-click printing to reduce errors and scale efficiently.
If you’re searching for a shipping label printer, you’re probably trying to answer a simple question: which printer should I buy?
At low volume, almost any setup works. You download a label, print it, and move on.
But as your order volume grows, label printing quickly becomes a bottleneck:
printing labels one by one
fixing size or scaling issues
switching between carriers and formats
What used to take seconds starts taking minutes. And those minutes add up.
Label printing sits at the center of your shipping workflow. And small inefficiencies there quickly affect everything else.
In this guide, we’ll help you choose the right label printer for shipping labels and show you how to set up a smarter printing workflow that’s faster, more consistent, and ready to scale.
What is a shipping label printer?
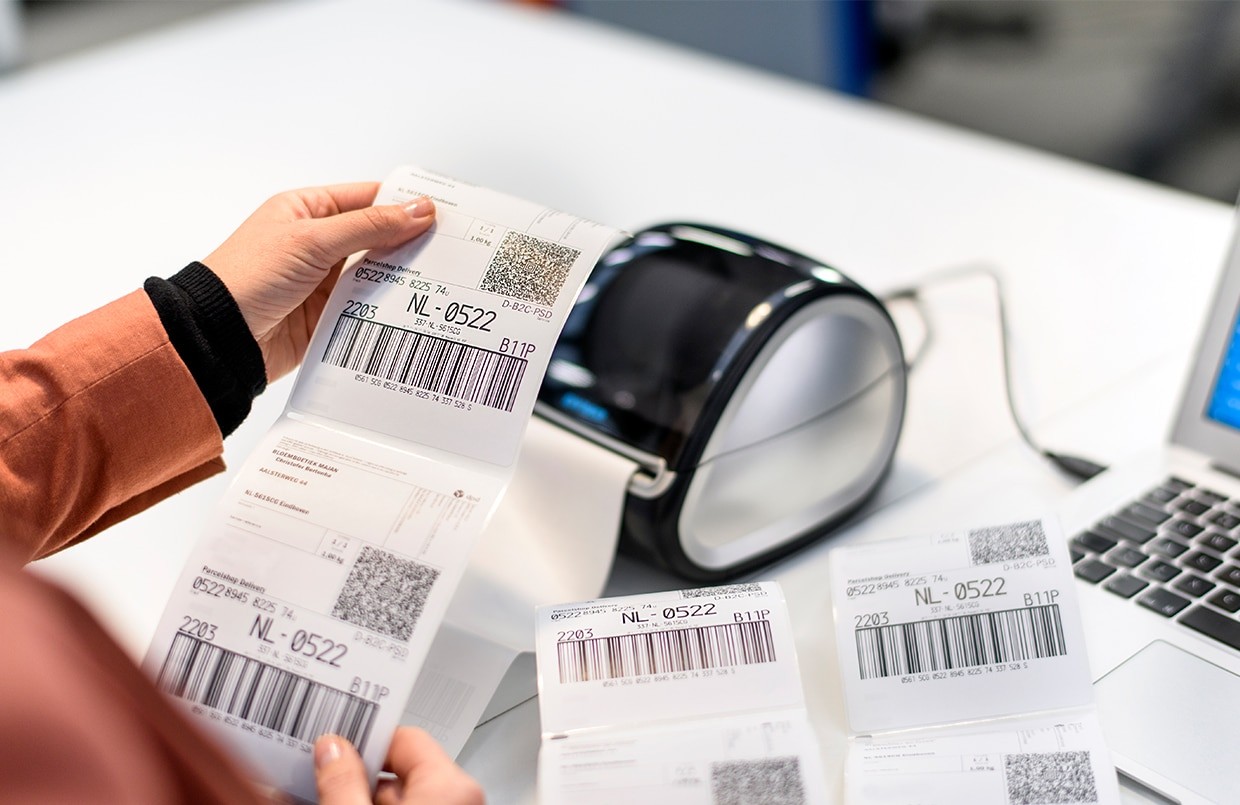
Let’s start with the basics. A shipping label printer is used to print the labels carriers rely on to scan, sort, and deliver your parcels.
You can print these labels with a standard office printer. But shipping labels aren’t like regular documents; they need to be:
correctly sized
clearly printed
easy to scan
If something is off, like the size, resolution, or alignment, carriers may not be able to scan the barcode. That can lead to delays, manual handling, or failed deliveries.
Dedicated label printers are built to avoid these issues. They:
print labels at fixed sizes (usually A6 / 4x6)
produce consistent, high-contrast barcodes
handle repeated printing without constant adjustments
For e-commerce businesses, that consistency matters. It helps reduce errors and keeps your fulfillment process predictable as volume grows.
Do you need a dedicated label printer or is a normal printer enough?
There’s no single “right” setup that works for everyone. It depends on how many orders you ship and how your workflow looks today.
When an A4 / laser setup is enough
A standard printer with A4 sticker sheets works if you:
ship a few orders per day
are early in your e-commerce journey
want a low-cost, simple setup
You print multiple labels on one sheet, peel them off, and apply them manually.
It gets the job done…but it’s a manual process, and small inefficiencies add up quickly.
When a dedicated thermal label printer makes more sense
A thermal label printer is built specifically for shipping labels.
It’s a better fit when you:
ship orders daily
want faster, more consistent printing
want to reduce manual steps in your process
Instead of printing sheets, you print one label at a time. Ready to apply immediately.
This reduces:
handling time
formatting issues
the risk of misprints
The break point: when manual printing starts slowing you down
Most merchants don’t switch setups because of the printer; they switch because of friction.
Signs you’ve outgrown a basic setup:
you’re printing dozens of labels per day
you keep adjusting size, scaling, or orientation
you switch between multiple carriers or formats
you spend too much time downloading and opening labels
At that point, improving your setup helps keep your operations efficient as you grow.
💡 When is it worth switching?
A good rule of thumb: once you’re printing around 20-30 labels per day, a dedicated label printer has usually already paid for itself.
The real cost of A4 printing isn’t ink; it’s time:
waiting for prints to dry
reprinting when something shifts
A thermal printer removes these steps and makes label printing faster and more predictable.
Thermal vs laser label printing for shipping labels
Once you move beyond a basic setup, the next decision is how you want to print your labels: thermal or laser.
Here’s how they compare:
Thermal printer | Laser printer (A4) |
|---|---|
Uses heat (no ink or toner) | Uses toner |
Prints one label at a time (A6 / 4x6) | Prints multiple labels per sheet |
Fast and consistent output | Slower for bulk printing |
Low maintenance | Requires more setup and adjustments |
Minimal manual handling | More manual handling (positioning, peeling) |
Best for daily or high-volume shipping | Best for low-volume or occasional shipping |
Which one should you choose?
Occasional shipping → a laser printer is often enough
Frequent or growing volume → a thermal printer is usually the better fit
For shipping labels, thermal printing is the standard for a reason:
no ink or toner to manage
consistent output
fewer interruptions during busy periods
Concerns about labels fading over time are rarely relevant in shipping. Labels only need to last until delivery.
Direct thermal vs thermal transfer
There are two types of thermal printing:
Direct thermal → uses heat-sensitive labels, no ink or ribbon required
Thermal transfer → uses a ribbon to transfer ink onto the label
For most e-commerce shipping workflows, direct thermal is the standard choice. It’s simpler to set up and requires less maintenance.
Thermal transfer is typically used for labels that need to last longer or withstand heat or moisture-less common for shipping labels.

What to look for when buying a label printer
The right label printer depends on how your shipping process works today and how it’s likely to grow.
Here are the key factors to consider:
Print volume
Start with how many labels you print per day:
A few labels → a basic setup is enough
Dozens to hundreds → speed and consistency become important
High volume / warehouse → reliability and repeatability matter most
Your volume determines how much time you can afford to spend on each label.
Label size support
Make sure your printer supports the label format you plan to use.
For most e-commerce shipping, that means:
A6 (4x6 / 105 × 148 mm) for label printers
A4 if you’re using a standard office printer
Not all printers support all sizes, so this is one of the first things to check.
💡A6 is the standard format used by most carriers and label printers. It reduces setup complexity and helps avoid common printing errors. Read more about it in our shipping label guide for e-commerce.
Print quality and DPI
Print quality directly affects whether your labels can be scanned.
Most label printers use:
203 DPI (standard)
300 DPI (higher detail)
If DPI is incorrect, labels can:
print too large or too small
appear blurry
produce unreadable barcodes
For shipping, clarity matters more than visual quality: your barcode needs to scan every time.
Connectivity
How your printer connects affects how flexible your setup is.
Common options:
USB (simple, single workstation)
Wi-Fi or Bluetooth (more flexible placement)
Ethernet (useful for shared or warehouse setups)
Cloud-based print management is also becoming more common in warehouse setups with multiple packing stations.
If multiple people need to print labels, network connectivity becomes important.
Compatibility with your workflow
Your printer needs to work with:
your e-commerce platform
your carriers
your shipping software
This is where small mismatches start to slow things down. A printer might work on its own, but still create friction in your day-to-day process if it doesn’t fit your setup.
Ease of setup and maintenance
Look for a setup that:
has reliable drivers
works with your operating system
doesn’t require constant recalibration
Frequent setup issues tend to slow down fulfillment more than hardware limitations.
💡 Don’t overlook label quality Cheap label stock and poor printer integration often cause more issues than the printer itself. Low-quality labels can affect barcode readability, and a disconnected setup leads to unnecessary manual work.
Key takeaway: Choose a setup that fits your workflow today and can handle your order volume as it grows.
Best label printer setup by business size
The best label printer setup depends less on the printer itself and more on how your operations are structured. As your business grows, the setup needs to reduce manual steps, keep output consistent, and support multiple users working in the same workflow.
Here’s what typically works at each stage:
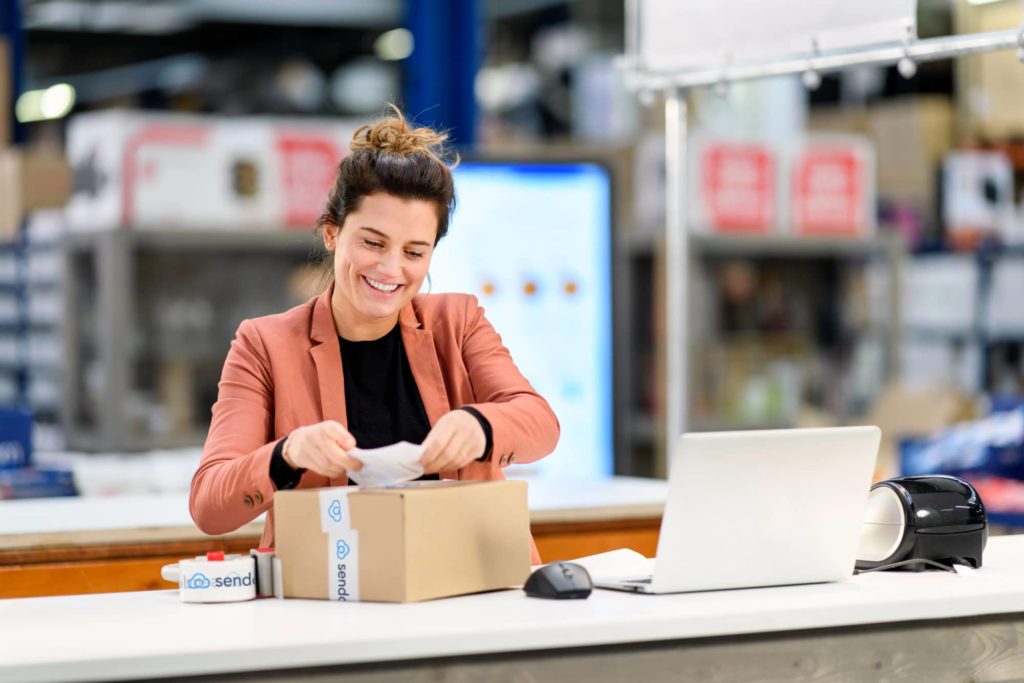
Home office / small merchant
If you’re shipping a few orders per day, your setup should be simple and easy to manage.
Typical setup:
A4 printer with sticker sheets, or an entry-level thermal printer
Manual label printing (one by one)
Basic shipping workflow
At this stage, speed isn’t the main concern. What matters is:
low setup complexity
minimal upfront cost
ease of use
This setup works well early on-but it becomes harder to manage as volume increases.
Scaling e-commerce business
Once you start shipping consistently (for example, 50-500 orders per day), small inefficiencies begin to slow you down.
Typical setup:
Dedicated A6 (4x6) thermal label printer
Standardized label format across carriers
Fewer manual steps in the printing process
This is where moving away from A4 printing makes a noticeable difference:
faster label creation
fewer formatting issues
more consistent output
At this stage, reducing repetitive tasks and avoiding errors becomes more important than keeping the setup flexible.
Warehouse / high-volume setup
In warehouse environments, label printing needs to be fast, repeatable, and consistent across teams.
Typical setup:
Standardized label printers across workstations
Shared printer configurations
Scan-to-print workflows during picking and packing
The focus here is on:
speed
accuracy
minimizing manual input
For example, workflows like scan-to-print (Pack & Go) allow teams to generate and print labels instantly while processing orders, without switching tools or screens.
💡 Avoid a common scaling mistake Relying on a single printer can quickly become a bottleneck. One issue during peak hours can slow down your entire dispatch process.
For higher volumes, having a backup printer or multiple stations helps keep operations running smoothly.
The best shipping label printers - Our all-time favorites
Once you’ve decided on your setup, it’s worth choosing a printer that’s already widely used and tested in e-commerce shipping. But remember, the exact model matters less than how well it fits your workflow. These are the two models we recommend at Sendcloud:
DYMO label printer
DYMO is one of the best-known brands of label printers. At Sendcloud, we specifically recommend the DYMO 4XL label printer for printing shipping labels. This is a thermal printer that prints at lightning speed (up to 53 labels per minute). This label printer is easy to install for computers running Windows and Mac operating systems.
Zebra label printer
The Zebra brand also has a good thermal label printer, the GK420D. This label printer is suitable for printing labels from 25 to 104 mm wide and prints up to 127 mm per second. There is no official driver for Mac, but an external program can be used to install the driver.
💡Don’t necessarily buy the cheapest label printer you find. We recommend that you invest in quality so you don’t waste shipping labels, avoid shipping errors and have a long-lasting printer. And don’t forget to consider the growth of your online store and the related increase in the number of shipping labels to be printed!
Also good to know: you don’t need a different printer for each carrier. Shipping labels follow standard formats, so one well-configured label printer works across carriers.
Common label printing problems and how to avoid them
Even with the right printer and setup, label issues can still happen. Most problems come down to incorrect settings or configuration.
Here are the most common problems and how to fix them:
Label prints too small or too large
This usually comes from a mismatch between your printer settings and label format.
What to check:
Paper size is set to A6 (4x6 / 105 × 148 mm)
DPI matches your printer (typically 203 or 300)
Scaling is disabled
If scaling is enabled, labels may shrink or stretch. And barcodes may stop scanning correctly.
Label is cut off or misaligned
This often happens when orientation or margins are incorrect.
What to check:
Orientation (portrait vs landscape)
Margins in your print settings
Instead of resizing the label, adjust margins to move it into the correct position.
Barcode won’t scan
Unreadable barcodes are usually caused by scaling or low print quality.
What to check:
Avoid resizing labels
Use the correct DPI setting
Print at full size whenever possible
For carriers, barcode clarity is critical. If it doesn’t scan, the shipment may be delayed or handled manually.
Labels are blurry or faded
This can be caused by printer settings or maintenance issues.
What to check:
Clean the printhead
Adjust print speed or density
Test with another document to isolate the issue
Printer not recognized
If your printer doesn’t appear or respond, the issue is often connection-related.
What to check:
USB or network connection
Printer drivers (install or update)
Printer status (online vs offline)
If you’re using a shared setup, test the printer directly on one device first.
Print client not detected
If your printing tool isn’t connecting properly, it’s often a browser or permission issue.
What to check:
Enable local network access in your browser
Restart the print client
Refresh your shipping panel
This allows your system to communicate with your printer correctly.

How to print shipping labels faster as you grow
Printing labels one by one works, until it starts slowing everything else down.
As order volume increases, small delays in your printing process begin to stack up:
downloading labels as PDFs
opening them manually
selecting the right printer each time
fixing formatting issues
printing labels together with packing slips using integrated labels, so you can pack orders and apply the label in one step
Individually, these steps take seconds. Together, they create friction across your entire fulfillment flow.
Many teams continue doing this longer than they should, even though bulk printing and automation can remove most of that manual work.
At this stage, improving speed comes down to reducing manual steps and standardizing how labels are created and printed.
What changes as you scale
As your operations grow, a few things become more important:
printing multiple labels at once instead of one by one
using the same label format across carriers
reducing the number of tools and steps involved
making the process repeatable across team members
This is where your printing setup becomes part of a broader shipping workflow.
From manual printing to automated workflows
Instead of downloading and printing labels individually, many teams move toward:
bulk label creation
one-click printing
automated label generation through rules or integrations
scan-to-print workflows during picking and packing
These changes reduce:
time spent per order
risk of manual errors
dependency on individual steps or tools
Why multi-carrier setups add complexity
If you’re working with multiple carriers, label printing becomes more complex:
different label formats
different portals
different processes
Without a standardized workflow, this leads to inconsistencies and extra handling.
Using one system to generate and print labels across carriers helps keep the process consistent, regardless of how many carriers you use.
How Sendcloud helps you print labels in seconds
Once your printer setup is in place, the next step is making the actual printing process faster and more consistent.
Sendcloud connects your shipping workflow directly to your printer, so labels can be created and printed without extra steps in between.
With the Print Client, you can:
print labels in one click without downloading PDFs
automatically send labels to the correct printer
control layout, margins, orientation, and DPI in one place
use the same setup for both A4 and A6 label formats
This removes a lot of the friction that comes from switching between tools or adjusting settings manually.

Better control over label quality
Label issues like incorrect size, cut-off labels, or unreadable barcodes are often caused by inconsistent settings.
With Sendcloud, you can standardize how labels are printed across your setup:
define paper size and format once
adjust margins instead of resizing labels
ensure DPI matches your printer
This helps keep label output consistent-regardless of which carrier you’re using.
Built for different setups
Sendcloud works with different printer types and operational setups:
home office → simple one-click printing
scaling teams → bulk label printing and fewer manual steps
warehouses → shared configurations and scan-to-print workflows
For example, teams can use Pack & Go to generate and print labels instantly during picking and packing, without switching between systems.
One workflow across multiple carriers
If you’re shipping with multiple carriers, Sendcloud keeps your label printing process consistent.
Instead of switching between carrier portals and formats, you can:
generate labels in one place
use the same print setup across carriers
keep label formats standardized
This reduces complexity and makes the process easier to manage as you scale.
Get your label printing setup right from the start
The best shipping label printer is the one that fits your workflow-not just your budget.
At low volume, almost any setup works. As you grow, that same setup can slow you down with extra steps, errors, and inconsistent output.
Choosing the right printer helps. A setup with fewer steps makes the biggest difference day to day.
If you want to spend less time printing labels and more time shipping orders, take a look at how Sendcloud helps you print labels in one click and scale your workflow as you grow.

Author and researcher
Kate is part of the Product Marketing team at Sendcloud, focused on helping merchants simplify shipping, scale operations, and turn delivery into a competitive advantage.

Subject matter expert
Greta Marini is a Product Manager at Sendcloud with a passion for automation and customer-centric product development. She contributes insights on shipping technology, workflow optimization, and the future of logistics innovation.
How much time can you save on shipping?
Share

Recommended for you
Shipping
Best label printers for shipping labels: a complete guide for e-commerce businesses
Choosing a shipping label printer? Learn when to use A4 vs A6, thermal vs laser, and how to set up a fast, scalable label printing workflow.

Integrations
Shipping
A Complete Guide to 3PL for E-Commerce Retailers
Considering a third party logistics, but unsure where to start? Check out this guide on a 3PL approach for e-commerce retailers.

Shipping Packaging
Picking and packing: a practical guide to warehouse optimization
Optimized picking and packing is the pathway to satisfied customers. Find out how to increase your efficiency and sales with our expert tips.